


Next.js can be deployed pretty much anywhere, and Google Cloud Functions could be a good option if you’re already using Google Cloud, or if you're using Google APIs.
Vercel is probably the best way to host Next.js apps, since it automatically deploys to a CDN and supports all the latest features, but if you want to run a custom server, for example, to put a simple password in front of your app, Vercel doesn’t support it.
Cloud Functions do, however, and in fact they require a custom server in order to work with Next.js. I’ll walk you through the process in this post so that we can password protect our Next.js app.
The advantage of using a custom server to password protect the app is that it works without requiring any client-side logic. This means that without the password, visitors will not be able to access the app or its API routes at all, so that they can’t circumvent the password by looking through the app’s bundled source code, and the API routes won’t need to be individually protected. Best of all, since the logic sits in front of our Next.js app, we won't need to complicate things in any of our UI components.
If you need full blown authentication and authorization for your app to protect user data, you’ll probably want to use something like NextAuth. Here we're just making a simple password that we can share with people who we want to use our app, and to keep random bots and visitors out.
Creating the Next.js App
The first thing we'll want to do is to create the Next.js app. You can use TypeScript, even though our custom server will use plain JavaScript to keep things simple. Use the following commands to create your app and fire up the dev server.
npx create-next-app next-gcf --ts
cd next-gcf
npm run dev
Install Functions Framework
The next thing we'll want to do is to install the Functions Framework. Google uses the Functions Framework to run your function in the cloud, and we can use it as a dev server to run our code the way it will be run in production. Shut down the next dev server and install functions-framework.
npm install @google-cloud/functions-framework
Functions Framework needs to know which file your function is in, so we can do that by setting the main field in package.json to the server we're going to create in server.js. We'll also tell Functions Framework which function to run by replacing the dev script in package.json.
// package.json
{
  "name": "next-gcf",
  "version": "0.1.0",
  "private": true,
  "main": "server.js",
  "scripts": {
    "dev": "NODE_ENV=development functions-framework --target=handleHTTP",
    "build": "next build"
  },
...
}
The functions-framework server won't work yet since we haven't created our custom server, so let's create a new file for that with touch server.js and provide the necessary code.
// server.js
const next = require("next");
const app = next({ dev: process.env.NODE_ENV === "development" });
const handler = app.getRequestHandler();

(async () => {
  await app.prepare().catch((err) => {
    console.error(err.stack);
  });
})();

module.exports.handleHTTP = handler;
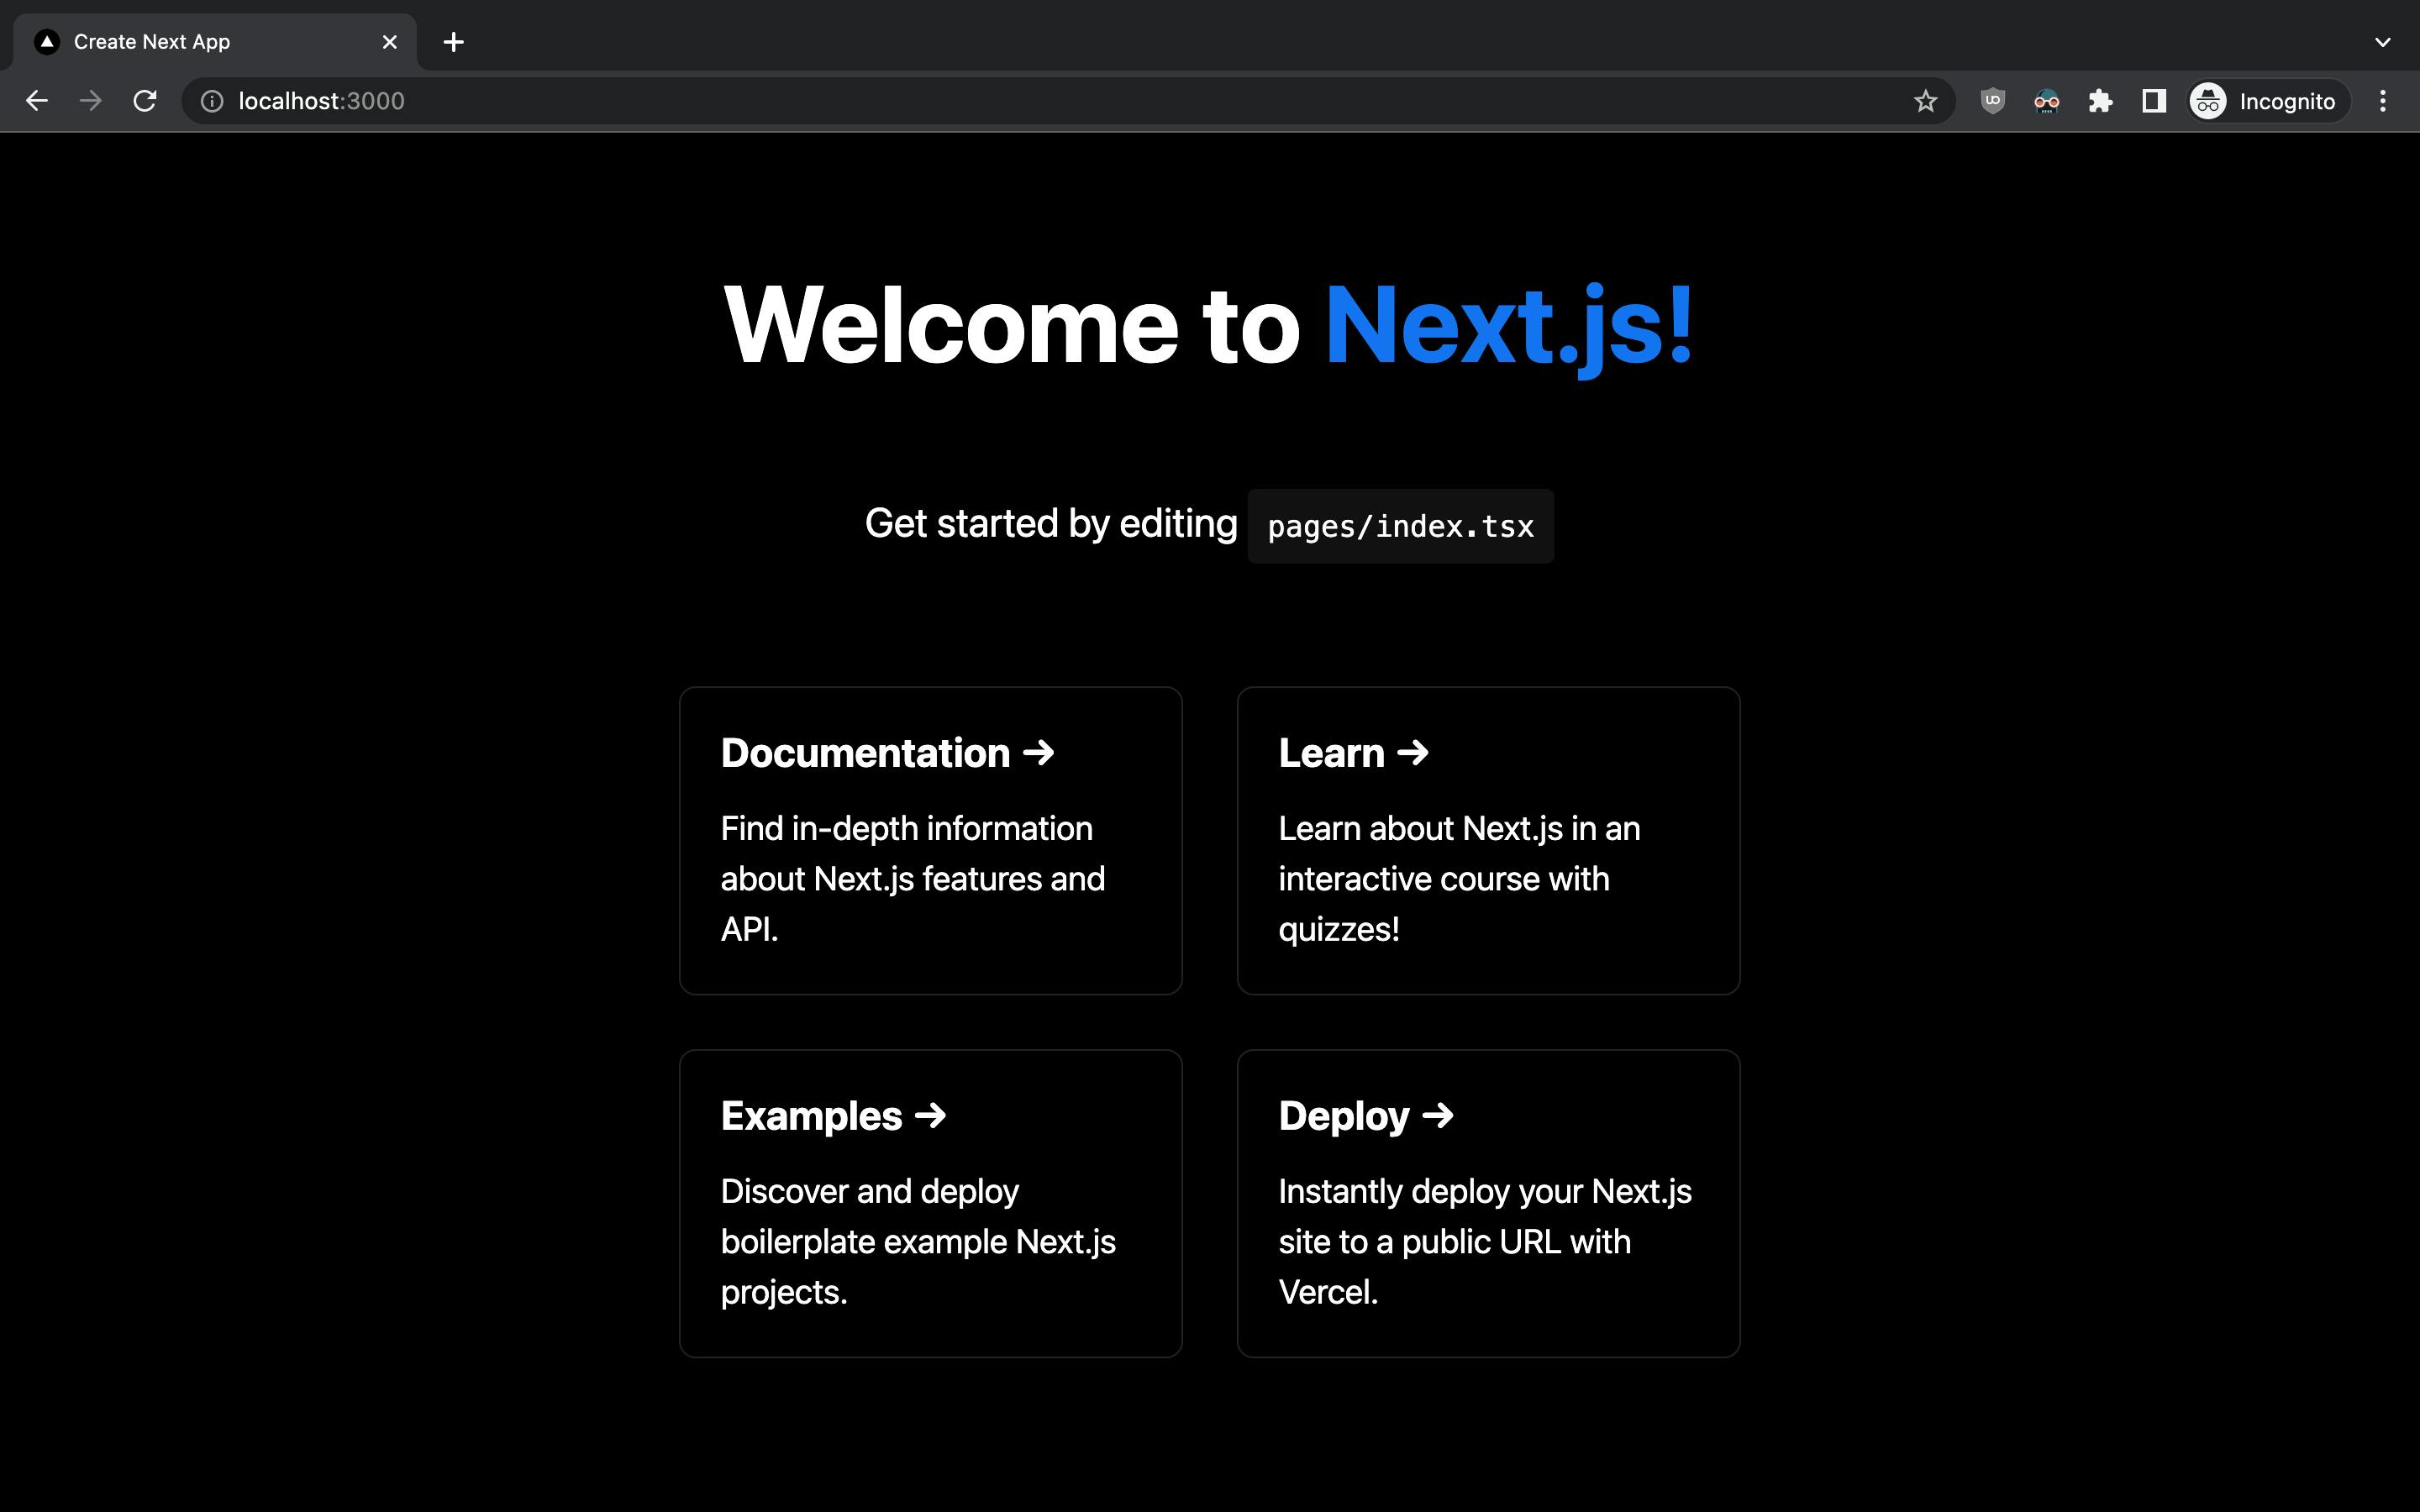
And there we have it. You should see something like this in your console and should now be able to visit your Next.js app at localhost:8080.
> next-gcf@0.1.0 dev
> NODE_ENV=development functions-framework --target=handleHTTP

Serving function...
Function: handleHTTP
Signature type: http
URL: http://localhost:8080/
info  - SWC minify release candidate enabled. https://nextjs.link/swcmin
event - compiled client and server successfully in 453 ms (169 modules)
wait  - compiling / (client and server)...
event - compiled client and server successfully in 1430 ms (217 modules)
Deploying to Cloud Functions
Now that your app is working locally. Let's deploy it to Cloud Functions so we can make sure everything is working properly. You'll need to have the Google Cloud CLI installed and be logged in to an account with access to a Google Cloud project. Additionally, you'll need to have the Cloud Functions and Cloud Build APIs enabled for the project.
We'll need two more scripts in our package.json to be able to deploy: one to deploy our source code and one to tell Cloud Build how to build our app.
// package.json
"scripts": {
    "dev": "NODE_ENV=development functions-framework --target=handleHTTP",
    "build": "next build",
    "deploy": "gcloud functions deploy next-gcf --project your-gcloud-project --entry-point=handleHTTP --trigger-http --allow-unauthenticated --security-level=secure-always --runtime=nodejs16",
    "gcp-build": "npm run build"
  }
Once the Google Cloud APIs are enabled, you can run npm run deploy and after a few minutes, your function should be live on the Internet. You'll want to look for the function's trigger URL in the console's output.
...
httpsTrigger:
  securityLevel: SECURE_ALWAYS
  url: https://us-central1-your-gcloud-project.cloudfunctions.net/next-gcf
...
If you visit the URL, you'll notice that something isn't quite right.
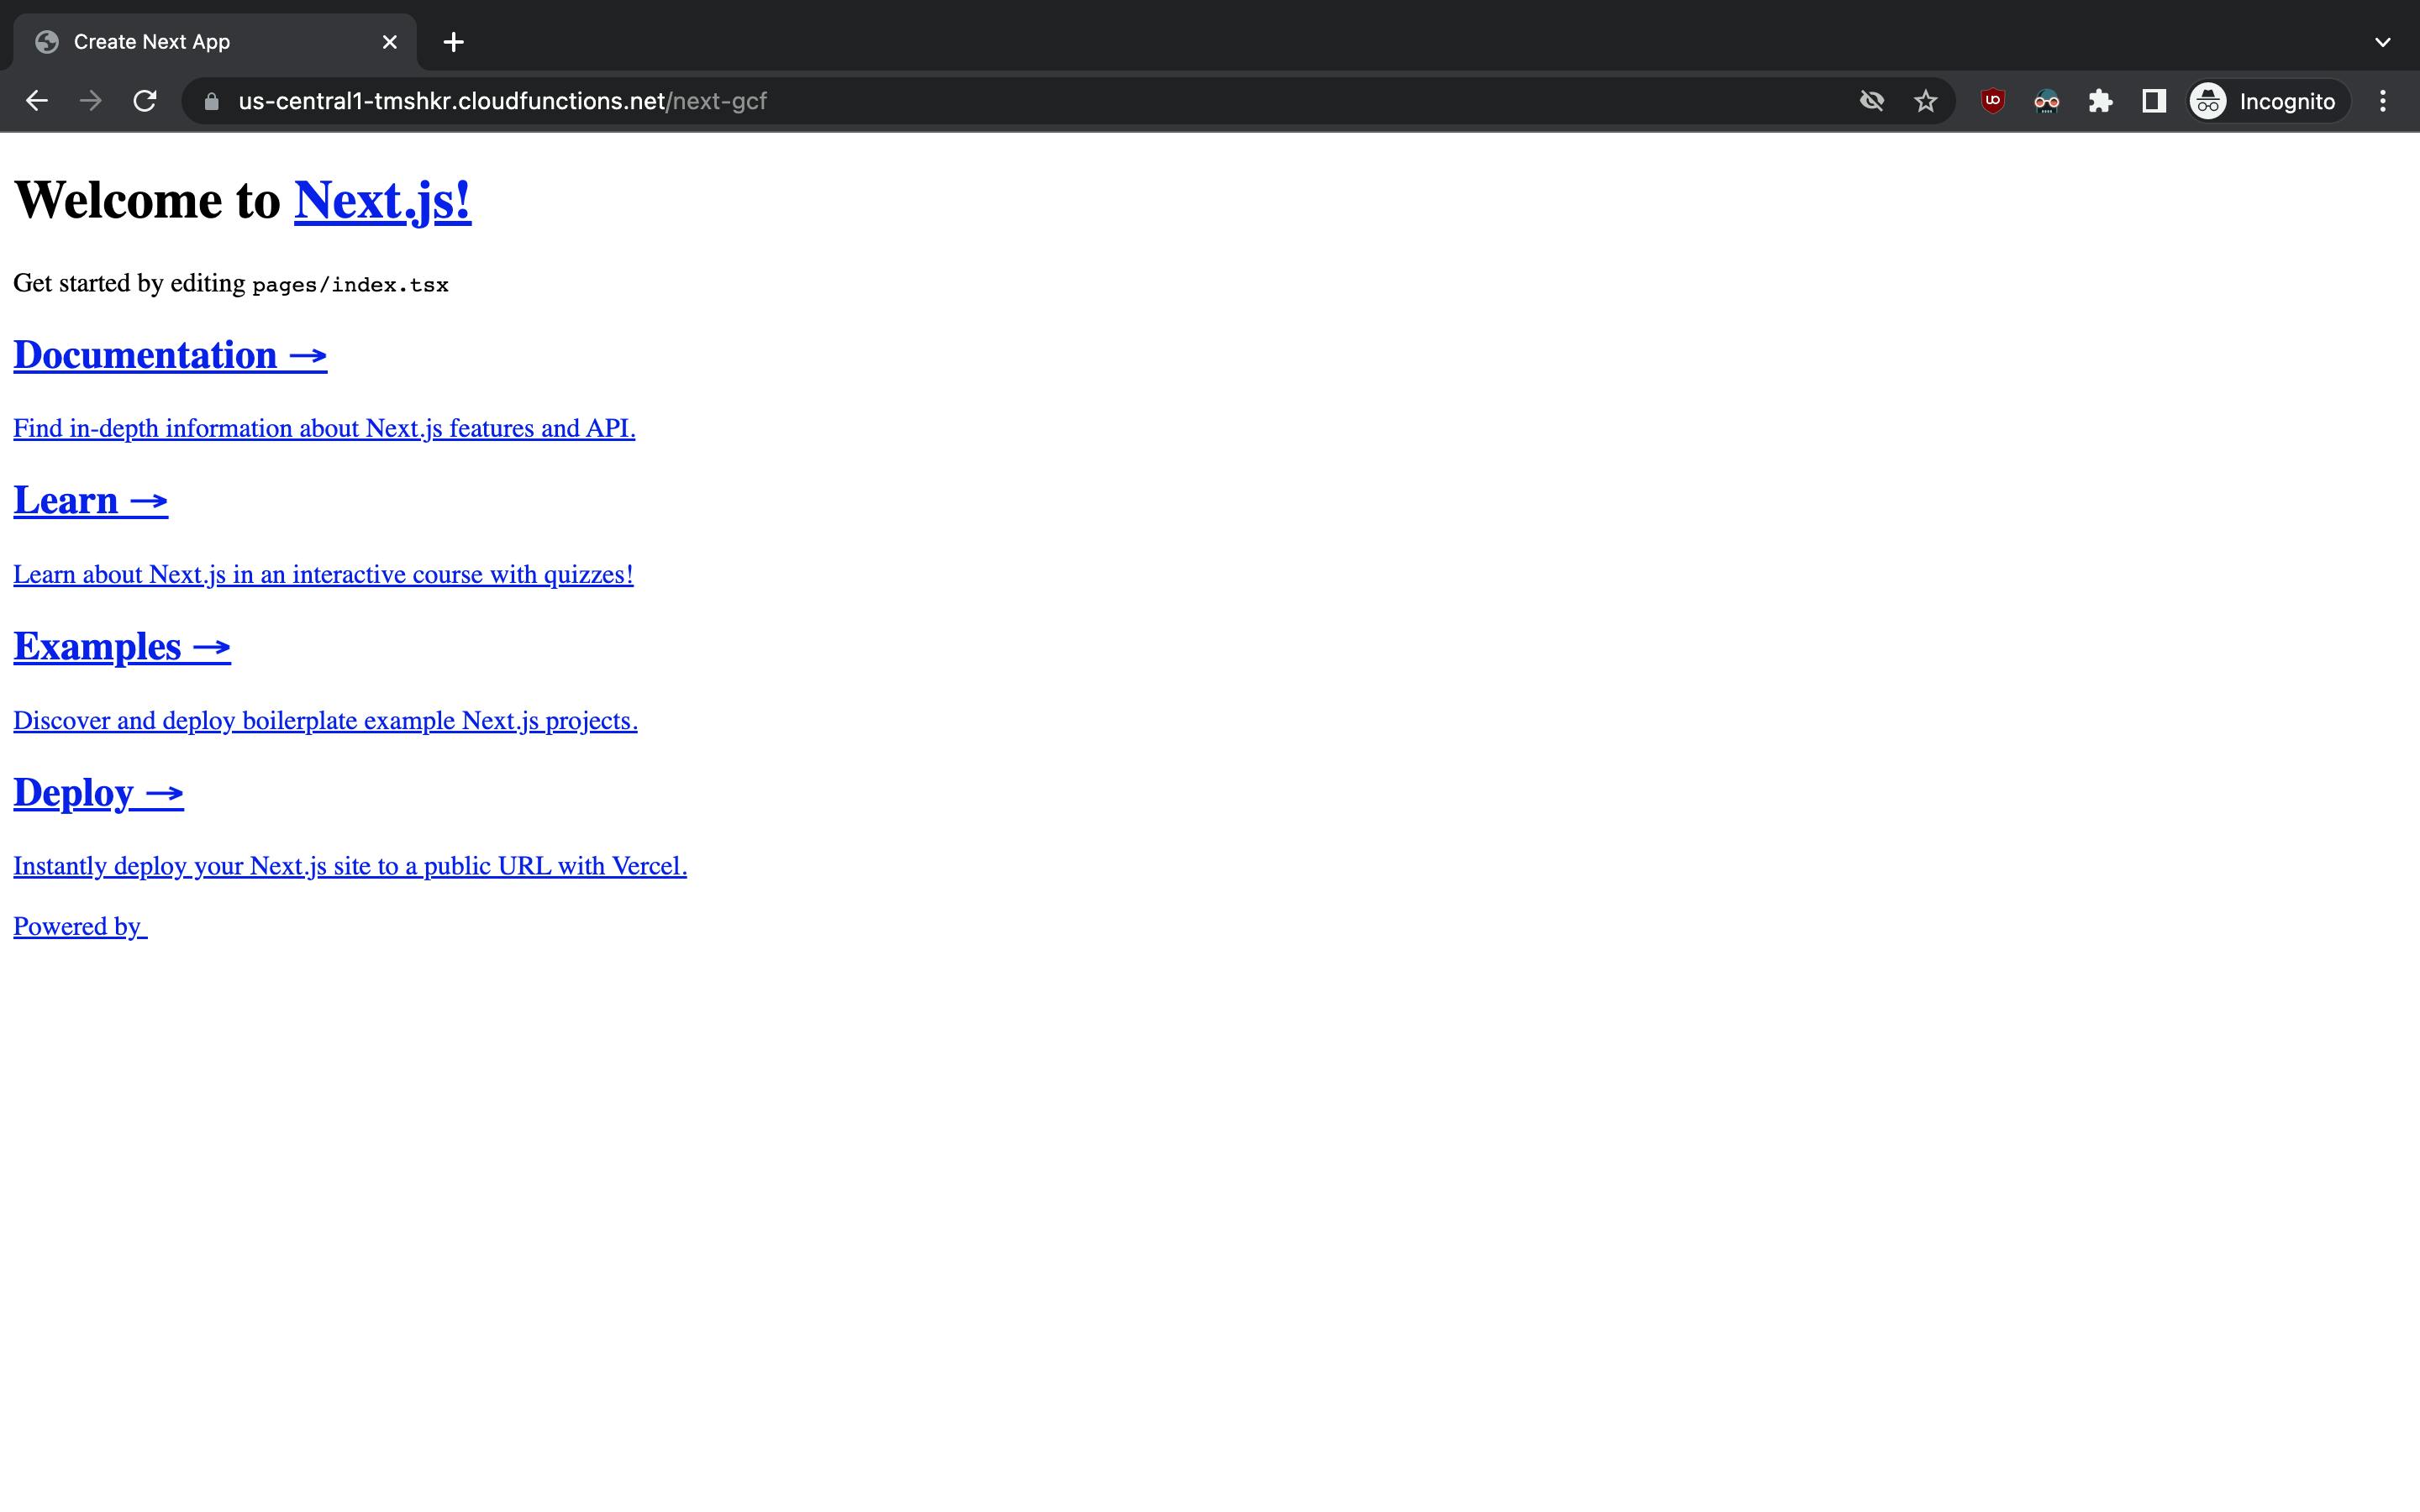
The assets haven't been loaded because Next.js expects them to be served from the root of the domain. You can fix that by updating your next.config.js.
// next.config.js
const isProd = process.env.NODE_ENV === "production";
const nextConfig = {
  reactStrictMode: true,
  swcMinify: true,
  assetPrefix: isProd
    ? "https://us-central1-your-gcloud-project.cloudfunctions.net/next-gcf"
    : undefined,
};

module.exports = nextConfig;
Deploy your function again with npm run deploy and the assets should now load properly.
Creating the Password Logic
Now that we have our custom server working, we can handle the incoming requests to check for a password. All we're doing is comparing one string value to another, but this technique could be used with a more robust authentication solution, like Google's Identity Platform, to do JWT validation instead.
We'll check for the password in a query string, so that if we want to share the app with people, we can easily include the password in the query string. HTTPS will encrypt the query string in transit, but it's not the most secure place to send a password, so be sure not to include any sensitive data.
// server.js
module.exports.handleHTTP = (req, res) => {
  const cookies = parseCookies(req);
  const magic_word = req.query.magic_word || cookies.magic_word;

  if (magic_word !== cookies.magic_word) {
    res.cookie("magic_word", magic_word);
  }
  if (magic_word !== process.env.MAGIC_WORD) {
    return res.status(401).send("Unauthorized");
  }

  handler(req, res);
};

function parseCookies(request) {
  const list = {};
  const cookieHeader = request.headers?.cookie;
  if (!cookieHeader) return list;

  cookieHeader.split(`;`).forEach(function (cookie) {
    let [name, ...rest] = cookie.split(`=`);
    name = name?.trim();
    if (!name) return;
    const value = rest.join(`=`).trim();
    if (!value) return;
    list[name] = decodeURIComponent(value);
  });

  return list;
}
Notice that we're setting a cookie, so that the magic_word query parameter will only need to be sent on the first request, and subsequent requests can just use the magic_word value set in the cookie. Be sure to set the MAGIC_WORD environment variable in your .env.local file and also a .env.prod.yaml file that we can use with gcloud. Update your deploy script with the env-vars-file parameter.
/// .env.local
MAGIC_WORD=abracadabra

// .env.prod.yaml
MAGIC_WORD: opensesame

// package.json
  "scripts": {
    "deploy": "gcloud functions deploy next-gcf --project your-gcloud-project --entry-point=handleHTTP --trigger-http --allow-unauthenticated --security-level=secure-always --runtime=nodejs16 --env-vars-file .env.prod.yaml",
  }
Deploy again with the environment variables and you should now get a 401 Unauthorized response when visiting your Cloud Function without the magic_word query parameter set (or set to the wrong value). If you visit your Cloud Function again with the query string set to ?magic_word=opensesame (or whatever you want to use as your password), you should see the Next.js app.
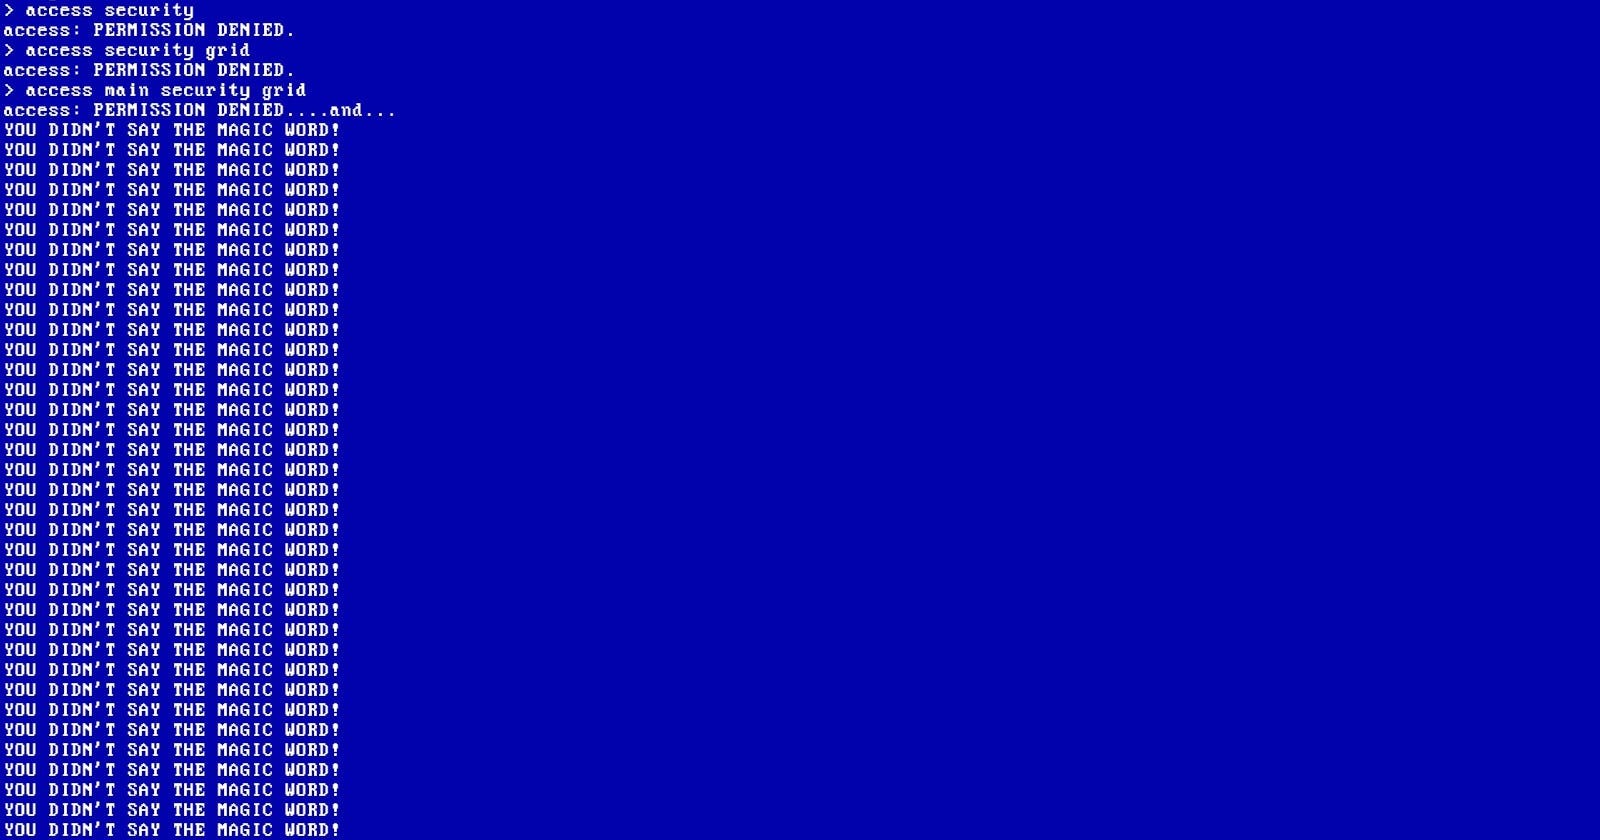
And that's it! You now have a password protected Next.js app live on the Internet, so that you can easily share your stealth-mode app with your friends and colleagues, do a private beta test, or even add a fun ACCESS DENIED screen.